Learn:整洁的TableView代码
原文链接:整洁的TableView代码
本文是对ObjC期刊一系列高质量博文所作的个人学习笔记。
本文约 3,534 字,可能需要 15 分钟阅读。
created: 2018-12-20
update: 2022-01-28 迁移至 github.io,调整链接,增补内容
2022-01-28:最佳实践
回头来看以前的垃圾文章,一堆废话,删就不删了,补充点东西。原文比较核心的东西就是介绍利用 protocol 抽象 cell 的过程。
cell protocol
issue-1-1 里已经提到过一些,重申一下,高复用的组件往往包含了 protocol 模式,但不是用了 protocol 就等于可复用,对 cell 来说,采用 protocol 模式的根本目的在于解耦。总是有那种非常常见的设计,对应一些非常常见的 cell,比如头像 + 名称 + 详情 + 箭头,单行,两行,等等等等。需要考虑的是,归根结底,cell 作为一种 view 是强业务相关的,应当尽量将它的适用范围限制在相应的业务模块内,实践上很难有哪个 cell 原封不动地在项目所有地方被使用;使用范围越广,cell 就越容易被加上更多的参数,逻辑判断与显示条件,这样的 commonView 也会变得越来越不直观,因为它的 UI 会根据各种条件而变化,使用者无法一眼看出这个布局的含义。
命名是个千古难题,组内之前喜欢用 -Representable 后缀来命名 cell protocol,例如ECReportListCellRepresentable ,我个人沿用 -DataSource 和 -Delegate 后缀,dataSource 用于获取数据,delegate 用于 cell 的一些按钮事件。
register protocol
科爷通过结合 Swift 的泛型和协议特性定义了一个简单协议,目的是避免在 cellForRowAt indexPath 回调中对 cell 进行 as 操作带来的冗余代码:
/// V1
func tableView(_ tableView: UITableView, cellForRowAt indexPath: IndexPath) -> UITableViewCell {
    if let cell = tableView.dequeueReusableCell(withIdentifier: "ACell", for: indexPath) as? ACell {
        //config cell A...
        return cell
    }
    if let cell = tableView.dequeueReusableCell(withIdentifier: "BCell", for: indexPath) as? BCell {
        //config cell B...
        return cell
    }
    //...
    return UITableViewCell()
}

/// V2
func loadTableView() {
    tableView.registerCell(MyCell.self)
}

func tableView(_ tableView: UITableView, cellForRowAt indexPath: IndexPath) -> UITableViewCell {
    let cell: MyCell = tableView.dequeueReusableCell(for: indexPath)
    cell.config(with: "")
    return cell
}
来看下关键实现:
public protocol Reusable: class {

    static var reuseIdentifier: String { get }
}

public extension Reusable where Self: UIView {
    /// id 实现需要考虑 nib 和 bundle 相关问题,这里是简写
    static var reuseIdentifier: String {
        return String(describing: self)
    }
}

public extension UITableView {
    /// 本质还是强解包,虽然不是好实现,但是这里没有什么办法
    func dequeueReusableCell<T: Reusable>(for indexPath: IndexPath) -> T {
        return dequeueReusableCell(withIdentifier: T.reuseIdentifier, for: indexPath) as! T
    }

    func registerClass<T: Reusable>(_: T.Type) {
        register(T.self, forCellReuseIdentifier: T.reuseIdentifier)
    }
}
cell model
考虑一下一个 tableView 内有多种 cell 的情况,现在需要对一个写满了 if indexPath.row == 0 或者 switch indexPath.row { case 0, 1: } 的 vc 进行一点改造。不少人喜欢这种写法:
/// V1
func tableView(_ tableView: UITableView, cellForRowAt indexPath: IndexPath) -> UITableViewCell {
    let cellData = viewModel.datas[indexPath.row]
    if let model = cellData as? ACellModel {
        let cell: ACell = tableView.dequeueReusableCell(for: indexPath)
        cell.config(with: model)
        return cell
    }
    // 一堆 else if ...
    assert(false, message: "get error cell data type!") // Tag1
    return UITableViewCell()
}

/// V2
func tableView(_ tableView: UITableView, cellForRowAt indexPath: IndexPath) -> UITableViewCell {
    // Tag2
    guard viewModel.sections.count < indexPath.section else {
        return UITableViewCell()
    }
    let sectionData = viewModel.sections[indexPath.section]
    guard sectionData.cells.count < indexPath.row else {
        return UITableViewCell()
    }
    let cellData = sectionData.cells[indexPath.row]

    switch sectionData.type {
    case A:
        switch cellData.type {
        case B:
            let cell: BCell = tableView.dequeueReusableCell(for: indexPath)
            // Tag3
            if let model = viewModel.getBModel(from: indexPath) {
                cell.config(with: model)
            }
            return cell
        case C:
            //etc.
        }
    case D:
        //etc.
    }
}
V1有一个潜藏的风险是,代码无法直接让开发者感知到 ACell 和 ACellModel 的联系。常见的是直接对 viewModel 做修改或者重构,出现 ACellModel 被改掉,或者 datas 没有正确地加入 ACellModel 类型的元素,等等情况。这个错误很低级,也是改动者的全锅,但确实有可能会发生。简单的做法是在 Tag1 的地方拦一句断言,但如果业务 A 是比较生僻的场景也会被漏掉。
V2 是基于 V1,针对于需要改动 TableView 数据结构的情景。基于 iOS 15.0 系统,观察这个页面。
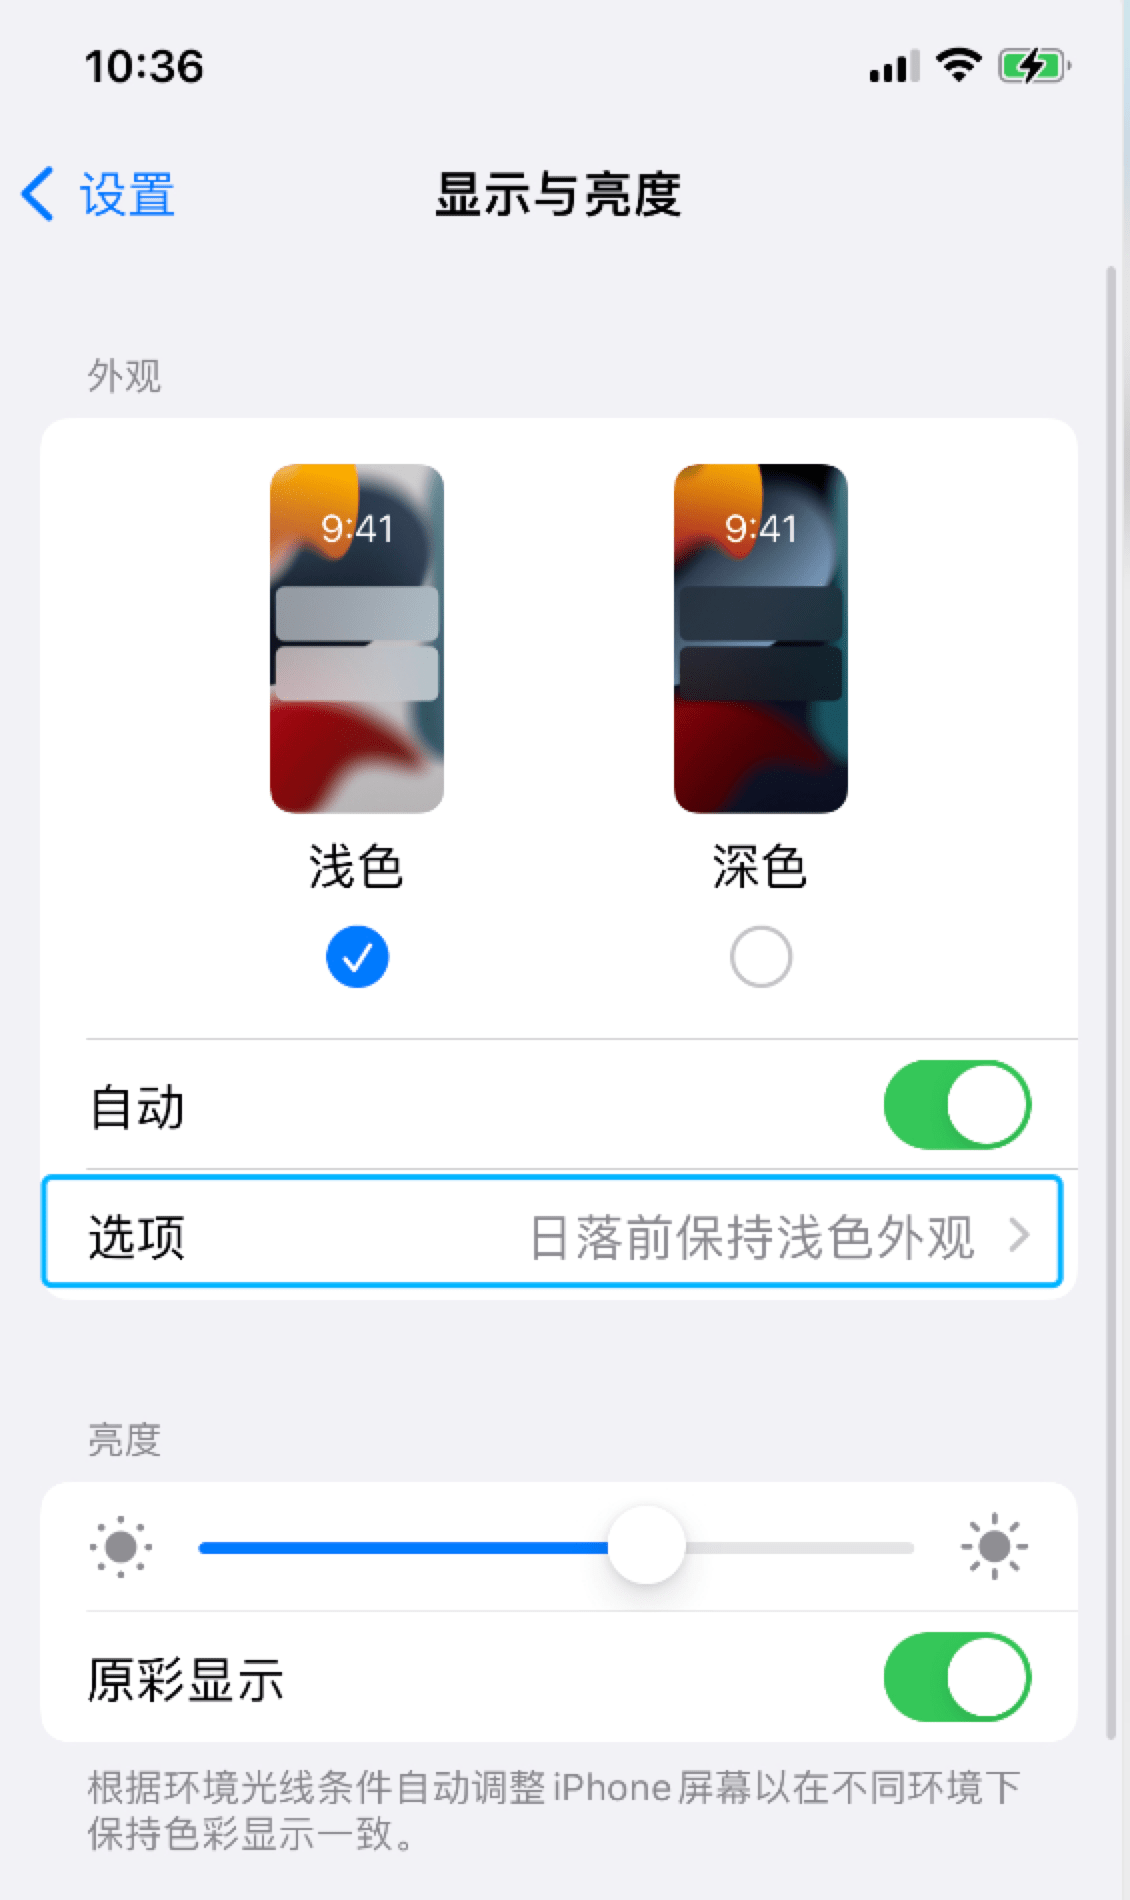
这里在切换开关时,下方的"选项"会相应地展示和消失。总会有这种类似的需求。为了实现分组 UI,要有 sections;因为选项可能携带了用户操作数据,往往不能简单地从 cells 里 add/remove,还需要设计类似 visable 的 Bool 属性值来控制显隐;不同的 cellModel 千差万别,需要有 protocol 抽象;综合一下的代码可能长这样:
/// cell 抽象
protocol ReportListCellable {

    var type: MyViewModel.CellTypes { get }

    var visable: Bool { get }

    var primaryKey: Int64 { get }
    // etc.
    var params: Any? { get }
}
/// section 抽象
protocol ReportListSectionable {

    var type: MyViewModel.SectionTypes { get }

    var cells: [ReportListCellable] { get }
    // etc.
    var title: String? { get }
    var params: Any? { get }
}

class MyViewModel {

    private var datas: [ReportListSectionable] = []

    var sections: [ReportListSectionable] {
        return datas.filter { ... }
    }

    //MARK: - CURD

    private func reloadData(with section: Int? = nil, row: Int? = nil) {
        if ("局部刷新") {
            self.delegate?.needReloadData(with: section, row: row)
        }
        //...
    }

    func getAModel(from id: Int64) -> AModel {
        if "越界判断",
         let a = datas.first(where: { ... }) as? AModel {
            return a
        }
        fatalError("...")
    }

    func getBModel() -> BModel {
        if let b = datas.first(where: { ... }) { return b }
        fatalError("...")
    }

    func updateCModel(with title: String?, detail: String?) {
        if let section = datas.firstIndex(where: { ... }),
         let row = section.cells.firstIndex(where: { ... }),
         let c = datas[section].cells[row] as? CModel {
            c.title = title
            c.detail = detail
            self.reloadData(with section, row: row)
        }
        assert(false, "...")
    }

}
CURD 一大堆方法的主要目的还是为了严格控制与 index 下标相关的处理,并收拢对象操作的入口。为了避免难以找到 sections 实例到底在过程中的什么地方被修改了,viewModel 通过 sections 暴露给 vc.tableView 数据,只在内部操作 datas 对象,这样一来,tableView.indexPath 的下标无法和 viewModel.datas 一一对应,迫使开发者只能通过 get/update 方法提供能力。
这种情况下 vc 代码会极为简洁,当然,这样很难真的拦住,而且格式代码量会急速增大。在 vc 内使用类似if let a = viewModel.sections[indexPath.section].cells[indexPath.row] as? AModel 的写法,然后直接修改对象 a 的属性并调用 tableView.reloadData() 是非常自然且省事的,缺点是这样针对对象的操作会散落在 vc 的各个角落,尤其时某些对象可能会被一直持有并传去其他页面修改时。
利用 type, id 等标识的重要目的就是重构。如果之前的 tableView 没有考虑数据会变动的情况,后来者往往会利用单独的标识来提取出不同样式的 section 和 cell 以实现一些 UI 效果。改过几次 if indexPath.section == 1 之后,你就会自然想换成 switch str { case "ReportHeader": //... } 的形式。这种代码最常见于 viewForHeaderInSection 之类的回调,为了方便快速地添加一个简单头视图或者提示,但是一旦 datas 发生变化,这些代码就需要同步修改。
2018-12-20:原文
UITableViewController VS. UIViewController
这里原作者还是耐心地介绍了如UIRefreshControl等一些UITableViewController的特性,并引申出可以使用ChildViewController来控制UITableViewController,但我认为在实际项目中基本可以宣告UITableViewController的死刑:我不觉得使用类似[self.view addSubView:self.tableView]的方式自行实现一些小功能会额外多出多大的开销,下拉刷新也有非常成熟的MJRefresh,如果这个特性本身并没有太大的优势同时又会带来诸多限制,那么选型时不被采用也是理所当然。
对于我来说更有意思的是ChildViewContoller:平心而论这一系列的容器API应该是比较基本的内容,但我平时项目确实极少用到addChildViewController:方法,绝大多数都是Tabbar和Navgation的组合,通过pop,push或是present在各个页面之间跳转。我认为万事皆有因果,而新技术的出现必然有其对应的需求场景,无论最后结果如何,花费时间精力去写新玩意的人一开始的动机肯定是为了解决某个他所遇到的实际问题。对于后来者而言,如果有条件能置身于类似的需求场景中,不失为学习的一种好方式。有一个可能的场景,就是类似今日头条首页的头部菜单:(如图)
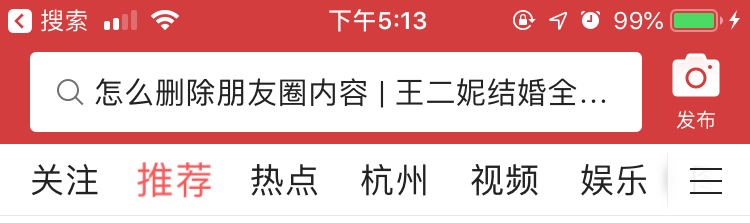
我个人觉得这个横向滑动的菜单粗看比较常见,UI实现也没什么难度,开源框架应该也不少,但如果业务需求庞大的情况下,问题恐怕不是那么好解决,常见的实现思路,也是自行实现很容易采用的方案,就是把整个菜单封装成一个View,通过回调来触发各种事件,由HomeViewController来统一管理。在这种思路下:
- 性能问题,首页做的事情太多必然拖慢启动速度,驻留在内存里的实例太大也会影响应用流畅性
- 如果菜单数量比较多,布局又各有千秋,很难让这些View全部都由一个HomeViewController来管理,不仅破坏了MVC的设计原则,也无法清楚地管理subView的生命周期事件,诸如
ViewWillAppear:等方法都享受不到 - subView还有各种各样的用户事件,作为View应该向上递交给ViewController来处理,这时如果只有一个HomeViewController来管理势必过于臃肿
- 结合网络请求的情况,诸如上拉下拉的时机都要小心控制,防止出现下拉距离过长等BUG,拿到数据后恐怕还要由HomeViewController来区别分发
- 如果左右滑动有动效,那前后一页应该是要做预加载的,这部分逻辑代码不会太少,不能全由HomeViewController来实现
所以虽然ChildViewController由于在通信上和其他问题可能会使得你的工程变得更加复杂,但或许会是在这个场景下比较不错的解决方案之一,起码可以实现View和Controller的对应,保护MVC的设计原则。关于ChildViewController网上的资料似乎并不太多,我暂时也没看到有比较好的项目源码实践,我觉得我应该在随后的文章(如issue1-4)里更详细地讨论这个问题。
分离关注点
这一段总的来说,作者介绍了一些非常实用的将cell彻底作为V层独立出来的思路和技巧,珠玉在前,我只是尽量补充一些例子,有一个比较简便的判断方法:看delegate或datasource实现方法里面有没有直接操作实例的属性,例如
- (UITableViewCell *)tableView:(UITableView *)tableView
         cellForRowAtIndexPath:(NSIndexPath *)indexPath
{
    LOStyle_2_Cell *cell = [tableView dequeueReusableCellWithIdentifier:@"LOStyle_2_Cell"];
    cell.detailLabel.text = @"test detail...";
    return cell;
}
很明显对tableView:cellForRowAtIndexPath:方法来说,它不应该关注LOStyle_2_Cell内部具体的cell,改进一些的方法会使用Model,类似于我在issue1-1中的写法:
- (UITableViewCell *)tableView:(UITableView *)tableView
         cellForRowAtIndexPath:(NSIndexPath *)indexPath
{
    LOStyle_2_Cell *cell = [tableView dequeueReusableCellWithIdentifier:@"LOStyle_2_Cell"];
    LOIBaseCellModel *cellInfo = self.cellDataArray[indexPath.row];
    cell.cellInfo = cellInfo;
    return cell;
}
这样的写法是我的习惯,它会把赋值代码放到cell.cellInfo的Setter方法里去,但是这样只是单纯把细节放到了cell内部,cell依然必须import相应的view model并持有cellInfo实例,还没有做到Model和cell的完全分离:
#import "LOIBaseCellModel.h"
@implementation LOStyle_2_Cell
- (void)setCellInfo:(LOIBaseCellModel *)cellInfo
{
    if (![_cellInfo isEqual:cellInfo]) {
        _cellInfo = cellInfo;
    }
    self.detailLabel.text = _cellInfo.detail;
}
@end
原作者通过给cell增加category来解决,这样cell跟具体的Model就真的毫无关系了,还能减少引用:
#import "LOIBaseCellModel.h"
@implementation LOStyle_2_Cell (ConfigHelper)
- (void)configCellInfo:(LOIBaseCellModel *)cellInfo
{
    self.detailLabel.text = cellInfo.detail;
}
@end
调用的时候变成:
#import "LOStyle_2_Cell+ConfigHelper.h"
- (UITableViewCell *)tableView:(UITableView *)tableView
         cellForRowAtIndexPath:(NSIndexPath *)indexPath
{
    LOStyle_2_Cell *cell = [tableView dequeueReusableCellWithIdentifier:@"LOStyle_2_Cell"];
    LOIBaseCellModel *cellInfo = self.cellDataArray[indexPath.row];
    [cell configCellInfo:cellInfo];
    return cell;
}
当然,我觉得对于非常普通的cell来说不必写得如此明确,所以重点是接下来的复用,当这个cell可能也需要被其他tableView使用的时候,由于已经利用category完成了M和V的彻底分离,就可以利用protocol来给Model规定具体的格式以便复用。原作者这里没写示例,我再加一点代码方便理解:
@protocol LOIBaseCellModelProtocol <NSObject>
- (NSString *)getDetail;
@end
@interface LOIBaseCellModel : NSObject <LOIBaseCellModelProtocol>
//do sth...
@end

@interface LOStyle_2_Cell : UITableViewCell
- (void)configCellInfo:(id<LOIBaseCellModelProtocol>)cellInfo;
@end
像这样,数据源只要实现了LOIBaseCellModelProtocol协议,configCellInfo:就能传不同的Model:
- (UITableViewCell *)tableView:(UITableView *)tableView
         cellForRowAtIndexPath:(NSIndexPath *)indexPath
{
    id<LOIBaseCellModelProtocol> cellInfo = self.cellDataArray[indexPath.row];
    LOStyle_2_Cell *cell = [tableView dequeueReusableCellWithIdentifier:@"LOStyle_2_Cell"];
    [cell configCellInfo:cellInfo];
    return cell;
}
如果datasource里有多种类型的cell呢?一般简单地使用if来判断,但如果这几种cell样式相似,那么可以考虑用继承来做,基类是LOStyle_2_Cell,子类内部对configCellInfo方法进行实现,这样datasource只需要直接传值:
- (UITableViewCell *)tableView:(UITableView *)tableView
         cellForRowAtIndexPath:(NSIndexPath *)indexPath
{
    id<LOIBaseCellModelProtocol> cellInfo = self.cellDataArray[indexPath.row];
    UITableViewCell *cell = [tableView dequeueReusableCellWithIdentifier:cellInfo.cellName];
    [(LOStyle_2_Cell *)cell configCellInfo:cellInfo];
    return cell;
}
有没有具体的应用场景?有的,IM项目的聊天页面就是很好的例子,聊天气泡cell功能相似,展示不同,数量众多,这里还是推荐可以看一下美洽客服(真不是广告!)的源码实现,思路非常的类似,他们在Model和Cell的基类中有额外做不少东西,然后把cell的方法也做成了协议,这样无论开发者要自定义cell还是Model都可以满足。
总结
这一篇主要是issue1-1的延伸,结合tableView和cell讲了实际项目代码中的干货,开篇挖了ChildViewController的坑,后面我结合自己平时写代码的习惯,补充了一点例子,本人才疏学浅,遗漏谬误在所难免,欢迎大家斧正补充!